


Description
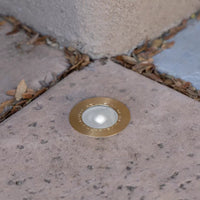
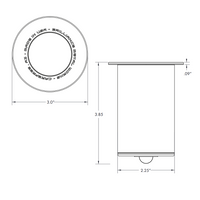
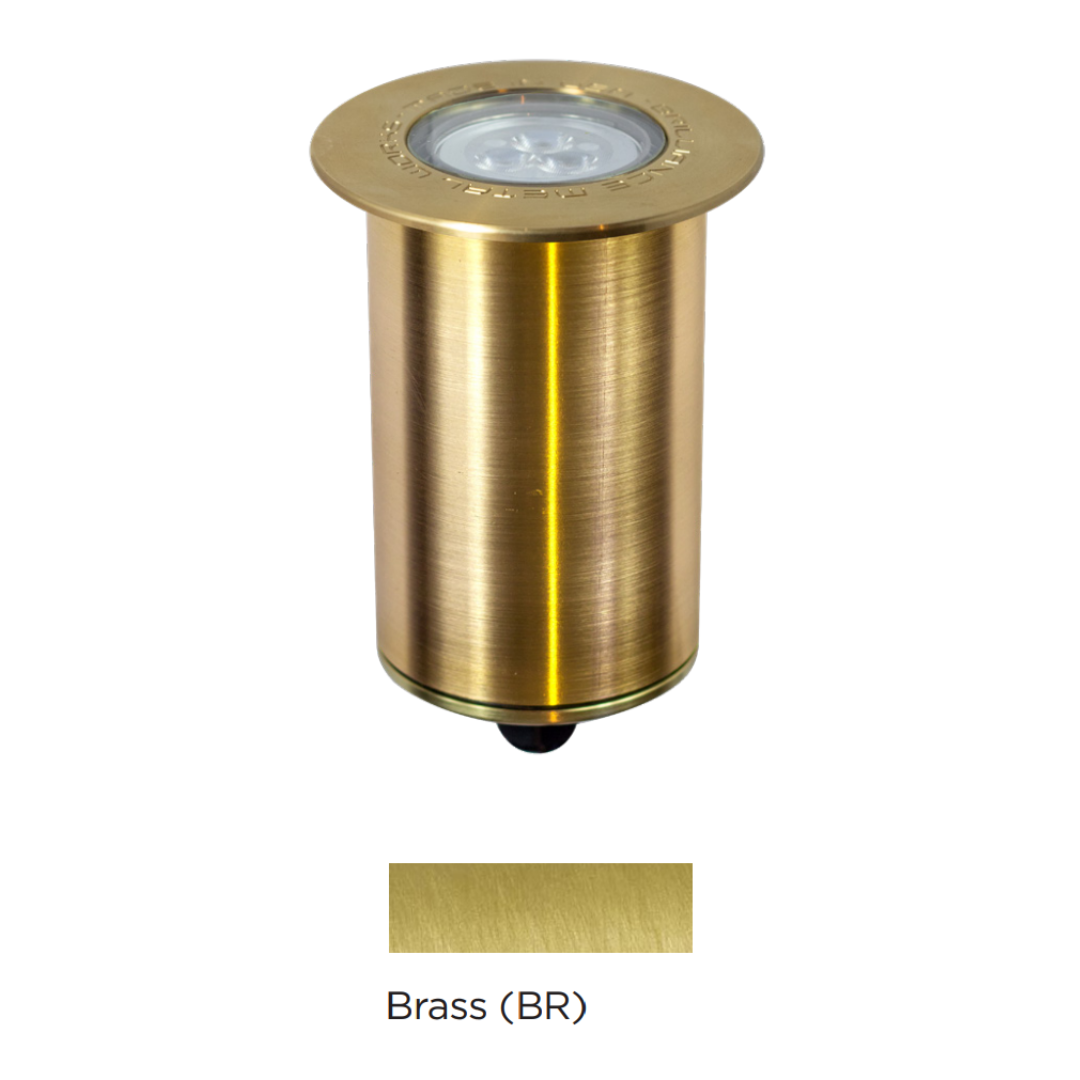
The Carlsbad Flange Well Light is ideal for recessed and hardscape applications like being core drilled into concrete, pavers, and driveways. (The recommended core drill size is 2.75 inches.) The Carlsbad Flange is fitted for any MR16 lamp and comes to life with the Brilliance Chameleon MR16. Like the original Carlsbad fixture, the flat glass top comes in a brass finish. For a complete outdoor lighting solution, consider incorporating lighting around the pool deck to enhance both safety and aesthetic appeal
The Carlsbad Flange fixture is available in brass. Machined brass offers a beautiful living finish that weathers over time to a unique patina.
To clean the fixture, periodically wipe it down with a mild soap and water.
To clean the fixture, periodically wipe it down with a mild soap and water.
Made in America. ETL Listed in US and Canada.
INSTALLING THE LAMP
-
Remove the rear cap and pull out the spring.
-
Set the MR16 lamp on top of the spring and plug it into the socket.
-
Insert this assembly into the fixture body with the front of the lamp toward the lens.
-
Screw the back cap onto the fixture body and hand tighten.
INSTALLING THE FIXTURE: GROUND MOUNT WITH SLEEVE
-
Dig a hole in the ground approximately 6” wide by 10” deep.
-
Connect the power cable to the fixture, leaving 2’ landscape cable coiled in the bottom of the fixture for future service.
-
Pour 8” pea gravel in the hole.
-
Place the fixture in the center of the hole.
-
Add more pea gravel to fill the hole 1” before the fixture lip. This allows for proper drainage around the fixture.
-
Apply glass wax on top of the lens to protect against standing water.
INSTALLING THE FIXTURE: CORE DRILLING WITH SLEEVE
-
Core drill a hole 2 3/4” wide by 10” deep into concrete or hardscape. Be sure there is room in the core drilled hole for proper drainage.
-
Attach the fixture cable to the main cable with the Lighting Shrink cable connection provided.
-
Insert the fixture into the sleeve and drop the fixture and sleeve into the core drilled hole.
-
Apply glass wax on top of the lens to protect against standing water.
All low voltage outdoor lights must be installed with a 12V Low Voltage Transformer and connections between lights must be secured using Grease Filled Wire Nuts (WN12) waterproof connectors.
All of our products are backed by our manufacturer's money-back guarantee, ensuring you receive a quality product free from defects. We Provide the best quality products and services. Feel free to contact us for any help or advice with this product!
Reason to Buy from Us:
- No surprises or hidden fees.
- Safe payments via PayPal.
- 30 Day Money Back Guarantee.
- Real helpful humans on our support help desk!
- Tracking number for every order

![]()

Brilliance Carlsbad Flange Low Voltage MR16 Brass Flat-Top In-Ground Well Light Outdoor Landscape Lighting
Subscribe to get 10% off on your first order!

Need help with lighting designs? We also do designs!
If you're unsure of how to do your outdoor landscape lighting design, submit photos to us and we will create photo-realistic outdoor night lighting designs with your daytime photos to give you an idea of how it will look at night with the lighting effects of our fixtures!
We have specialized and licensed professionals located in Los Angeles, CA who can get the job done for you! Contact our specialist electrician in Los Angeles for a professional outdoor low voltage landscape lighting installation done with our popular products.
Find a specialist in Los Angeles, CA here!
| Light Fixtures | |
|---|---|
Product Type |
In-Ground Well Lights
|
Bulb Type |
In-Ground Well Lights
|
 | |
|---|---|
| Light Fixtures | |
Product Type |
In-Ground Well Lights
|
Bulb Type |
In-Ground Well Lights
|